
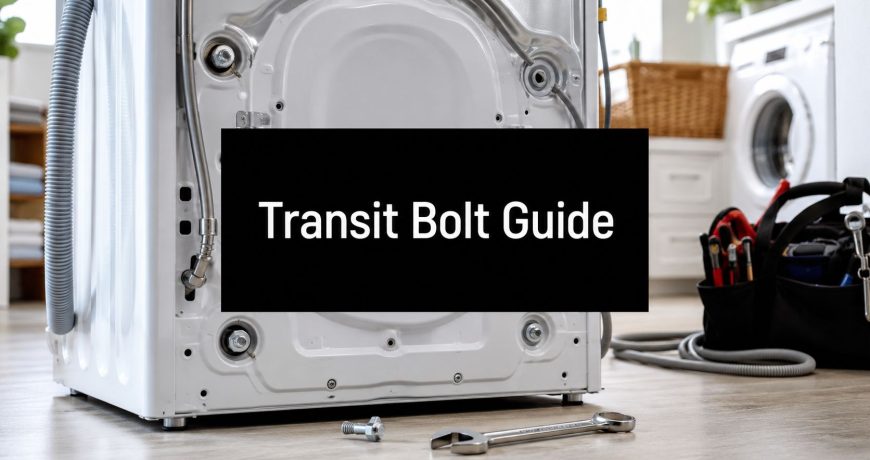
Transit Bolts for Washing Machine: 2026 Removal Guide
You've packed the kitchen, taped the book boxes, and worked out how the couch is getting through the front door. Then you walk into the laundry and hit the awkward item everyone leaves until last. The washing machine is heavy, hard to grip, still connected, and full of little risks often overlooked until something goes wrong.
That's usually when the question comes up. What about the transit bolts for a washing machine? If you've bought a new front-loader, recently unpacked one, or you're preparing for a move across Melbourne, those bolts are more important than often understood. They're small, easy to lose, and often ignored right up until moving day.
I've seen the same pattern plenty of times. Someone is organised with boxes, labels, keys, and utility transfers, but the washer is still sitting there with hoses attached and no idea where the original bolts went. Or worse, the machine was delivered, installed, and the bolts were never removed properly before first use. Both mistakes can become expensive.
For anyone planning a local shift, apartment move, or bigger relocation, this is one of those details worth getting right before the machine moves an inch. If the rest of your move is still taking shape, a good starting point is this guide to Melbourne movers for house and apartment relocations.
Your Pre-Move Washing Machine Puzzle
The laundry usually becomes the forgotten room in a move.
You've dealt with the obvious things first. Clothing is boxed, pantry items are sorted, the TV is wrapped, and the bed has been dismantled. Then you're left facing a white box in the corner that looks simple enough until you remember it holds water, has moving internal parts, and weighs enough to punish a rushed decision.
Why this catches people out
A washing machine doesn't look delicate from the outside. It looks solid. That's why plenty of people assume it can just be unplugged, wheeled out, and loaded like any other household appliance. The outside shell suggests strength. The inside tells a different story.
The vulnerable part is the drum assembly. It isn't meant to be rigid while the machine is operating. It's meant to move in a controlled way. That's great for washing clothes, but not great when the appliance is bouncing through driveways, thresholds, lifts, laneways, and stop-start traffic.
Practical rule: If you're asking whether the washer needs special prep, the answer is yes.
The most common moving-day misunderstanding
A lot of homeowners and renters have heard the term transit bolt before, but only vaguely. They know it has something to do with delivery or installation. They don't know whether it matters for a short move, whether every machine has them, or what to do if the bolts disappeared years ago.
That uncertainty creates delays. It also creates risky shortcuts.
Here are the situations that usually lead to trouble:
- The machine was installed years ago: The original bag of bolts is gone, and nobody remembers where it was stored.
- The washer was recently delivered: The bolts are still in, but the owner isn't sure whether they should remove them before running the first cycle.
- The move is local: People assume a quick trip across town doesn't justify the hassle.
- The laundry is tight: There's pressure to disconnect and move fast before access windows, lift bookings, or building rules become a headache.
What deserves attention first
Before you think about dollies, blankets, or truck loading, deal with the machine itself. A washing machine can survive a careful move well if it's prepared properly. It can also suffer internal damage even when the outside looks untouched.
That's why transit bolts sit high on the checklist. They're one of the smallest parts involved in moving a washer, but they influence whether the drum stays protected in transport and whether the machine is safe to use afterwards.
What Are Transit Bolts and Why Do They Matter
Transit bolts are the shipping locks fitted through the back of many front-loading washing machines. They hold the drum steady while the machine is being carried, tilted, loaded into a truck, and driven over rough roads.
That matters more than many Melbourne homeowners expect.
A washer drum is designed to move in a controlled way during a wash cycle. During a move, that same movement can become a problem. Every pothole, speed hump, tight apartment lift turn, and hard stop on city roads sends force through the cabinet. If the drum is left free, those shocks can strain the suspension, mounting points, and other internal parts.

In our line of work, this is one of the easiest mistakes to prevent and one of the more frustrating ones to see after the fact. The machine may look fine from the outside, then start shaking badly or sounding wrong once it is installed in the new place.
What the bolts actually protect
Transit bolts mainly protect the parts that support and control drum movement inside the cabinet.
| Part | During washing | During transport |
|---|---|---|
| Drum | Moves in a controlled way | Needs to be held still |
| Suspension | Absorbs spin movement | Can be overloaded by jolts |
| Cabinet | Supports the machine body | Can be struck by internal movement |
Short moves are not automatically low risk. A Brunswick-to-St Kilda move with narrow stairs, damp laneways, and repeated tilting can be harder on a washer than a longer, cleaner run on open roads. Melbourne weather adds another layer. On humid days, grips get slippery, concrete can sweat, and rushed handling becomes more likely.
The other mistake homeowners make
Transit bolts are only for transport. Once the machine is in place, they need to come out before the first wash.
Leave them fitted and the washer can vibrate violently because the drum is still locked. That is when owners start blaming the floor, the leveling, or the removalists, when the actual issue is still sitting in the back panel. As noted earlier, manufacturers warn against running the machine with the shipping bolts installed.
What works in practice
The safest approach is simple. Fit the transit bolts before the move, then remove them only after the washer is positioned, leveled, and ready for use.
What usually causes trouble is:
- moving the machine without the bolts installed
- running a wash cycle with the bolts still in
- assuming a local move does not justify proper prep
- ignoring sudden harsh vibration after installation
If you are moving more than one large appliance, use the same prep mindset across the board. The handling steps that protect a washer are similar to the care needed when moving a fridge safely in 8 steps. Small preparation jobs prevent expensive callouts later.
A transit bolt is a small part, but it controls whether the heaviest moving component inside the washer stays protected or gets knocked around all the way to the new address.
How to Safely Remove Transit Bolts Before First Use
You get the washer into place, connect the hoses, and feel ready to run a quick test load. Then the machine starts jumping across the laundry because the shipping hardware is still fitted. We see that after deliveries and house moves more often than people expect, especially when a washer has been unpacked in a hurry.

A safe removal method
Remove the bolts only after the machine is in its final position and close to level. That saves you from dragging it out twice, and it reduces the chance of misplacing parts between unpacking and setup.
For most front-loaders, the process is straightforward:
Pull the machine out enough to work comfortably at the back
Good access matters. Tight corners lead to slipped tools and rounded bolt heads.Locate each transit bolt on the rear panel
They are usually grouped clearly across the back. If the layout is unusual, check the user manual for your model.Use the correct tool size
A socket wrench or spanner is usually the right choice. Many machines use a common metric size, but the manual should guide you before you start. If the tool feels loose on the head, stop and switch tools.Loosen each bolt with steady pressure
Keep the tool square to the bolt. Slow, even force works better than sharp pulls.Remove the full assembly
Some models include sleeves or spacers with the bolt. Take out every transport piece, not just the visible fastener.Fit the plastic caps or plugs supplied with the washer
They close the rear openings and stop dust or moisture getting in.Store the bolts straight away
Put them in a sealed bag and tape it to the back or keep them with the manual. That one habit saves a lot of frustration on moving day.
The same disciplined prep helps with other large appliances too. If you are organising the whole laundry and kitchen at once, this guide on how to move a fridge in 8 steps without damaging it is a useful companion.
When a bolt is stuck
Melbourne homes add a few real-world complications that manuals rarely mention. In bayside suburbs and older properties, damp laundries, salty air, and long periods of storage can leave fasteners tighter than expected. A bolt can also bind if the drum is resting with pressure against the transport mount.
An Australian whitegoods support case on JustAnswer about a transit bolt that would not come out after unpacking shows the kind of problem owners run into.
Trade tip: If the bolt feels wrong, stop. Stripping the head or cracking the plastic mount turns a simple setup job into a repair job.
What to try before calling for help
Work through these checks in order:
- Reset your tool position. Keep it fully seated on the bolt head.
- Take pressure off the drum. A small shift in the machine's position can help if the fastener is loaded awkwardly.
- Use controlled force. Jerking the wrench is how heads get rounded.
- Avoid poor-fitting adjustable tools. They can work, but only if they clamp tightly with no play.
- Watch the back panel. If the casing starts flexing, stop and get model-specific advice.
If a bolt still will not move, professional support is cheaper than damaging the rear panel, the mounting point, or the tub assembly before the machine has even done its first wash.
Reinstalling Transit Bolts for Your Melbourne Move
A lot of moving damage starts before the appliance even leaves the laundry. The washer gets disconnected properly, the hoses are drained, and then the drum is left unsecured for the trip.
That's the step to fix before moving day.

How to put them back in
If you still have the original bolts, reinstalling them is usually easier than removal.
- Pull out the plastic plugs from the rear panel holes and keep them somewhere safe.
- Line up each transit bolt with its original opening. Start by hand so you don't cross-thread it.
- Tighten evenly with the correct tool. Firm is enough. You don't need to over-muscle it.
- Check that each bolt is seated properly before the machine is moved.
If you're also arranging temporary storage during a move, this guide to furniture removal and storage in Melbourne helps with the broader planning side.
The short local move debate
Under Melbourne conditions, the conversation becomes more interesting.
Standard advice says remove transit bolts before use and reinstall them for transport. That part is clear. The grey area is whether a very short local move across Melbourne justifies the effort. There's underserved discussion around short trips under 50km, and a contrarian view suggests intentional retention of the bolts for those local moves may help protect the drum suspension from sudden braking and rough urban conditions, despite manufacturer warnings that they must be removed before use, as discussed in this Australian transit bolt article.
That nuance matters here because city moves aren't always gentle. A washer can face:
- Stop-start traffic on busy Melbourne routes
- Sharp braking in suburban traffic
- Driveway lips and gutters
- Lift thresholds and truck ramps
A short trip isn't always a soft trip.
The practical call
For transport, even short transport, reinstalling the bolts is the safer choice if you have them. The trip from one suburb to the next can still involve enough movement to stress an unsecured drum. The fact that the move is local doesn't remove the risk. It just changes where the jolts come from.
A visual walkthrough can help if you want to see the process in action:
The main rule is simple. Bolts in for transport. Bolts out before washing.
Lost Your Bolts How to Store and Replace Them
This is one of the most common problems with washing machine moves. The original bolts were removed years ago, put “somewhere safe”, and never seen again.
Once they're gone, people are tempted to improvise. That's where poor decisions start. Transit bolts are not a detail to fake with random hardware from a shed or toolbox.
The best storage method
As soon as the bolts come out after installation, put them in a sealed bag and attach that bag to the machine or tuck it with the manual in a place everyone in the household knows about. Good storage beats frantic searching every time.
What doesn't work well:
- Loose bolts in a junk drawer
- Bolts stored separately from the appliance paperwork
- Mixing them with general screws and brackets from other furniture
- Assuming replacements are universal
How to replace them properly
If the originals are missing, identify the exact brand and model of the machine first. That information is usually on a compliance or model label. Once you have that, look for a matching part rather than a “close enough” bolt.
There are real examples in the Australian market. Haier sells a replacement transit bolt, model H0020808355B, for approximately $7.95 per bolt, and Electrolux Australia offers a complete front-loader transit kit, part #4055550190, with a $14.95 shipping fee across the country, according to this Australian spare parts listing for transit bolts.
Why exact parts matter
Length, thread, seating, and fit all matter. A bolt that's too short may not secure the drum correctly. One that's too long or mismatched can create a different problem altogether.
A practical buying checklist helps:
| Check | Why it matters |
|---|---|
| Brand and model | Transit bolts are model-specific |
| Part number | Reduces the chance of ordering the wrong item |
| Original quantity needed | Some machines use different sets |
| Condition of rear panel holes | Helps confirm the machine can accept the replacements cleanly |
If you're between homes and trying to keep appliance parts, cords, and manuals together, organised packing becomes much easier when storage is part of the plan. This guide to storage unit options and prices near you can help keep loose household essentials from disappearing during the move.
Your Expert Checklist for a Perfect Machine Move
A washing machine move goes smoothly when the prep is boring. That's a good thing. The fewer surprises you create in the laundry, the fewer problems you carry into the truck, the building corridor, and the new home.
The prep checklist that saves trouble
Use this as a final run-through before moving day:
- Empty and dry the drum: Don't leave damp laundry, loose coins, or detergent residue inside.
- Disconnect power safely: Unplug the machine and secure the lead so it won't drag.
- Turn off the water supply: Shut the taps before touching the hoses.
- Drain the hoses fully: Keep towels and a bucket handy so residual water doesn't end up on floors or in the truck.
- Remove or reinstall the transit bolts at the right time: Out before use, back in before transport.
- Secure hoses and cord to the rear: Loose lines catch on everything.
- Protect the outside finish: Wrap the machine so door frames, walls, and the cabinet don't get scratched.
- Keep the machine upright: Avoid unnecessary leaning and rough handling.
- Check the path out: Doors, corners, lifts, steps, and parking access all matter more than people expect.
Final check: If the machine still contains water or the cord is dangling, it isn't ready to move.
A clean finish helps at both ends
If you're vacating a rental or setting up a home for handover, laundry prep usually sits alongside a bigger cleaning list. A detailed professional cleaning guide can help you avoid missing the small but important jobs around appliances, wet areas, and utility spaces.
For the wider move itself, a solid moving house checklist for Australia keeps the laundry item from becoming the thing you remember last.
What people regret most
It usually isn't the effort of doing this properly. It's skipping one small step because the move felt close, simple, or rushed.
The machine was “only going a few suburbs away”. The bolts were “probably not necessary”. The hoses were “mostly drained”. Those are the kinds of shortcuts that turn a routine move into a repair problem.
If you handle the washer with care, keep the drum secured for transport, and avoid using the machine until it's set up correctly again, you remove most of the preventable risk.
If you want your move handled by an experienced team, Get n Go Removals Melbourne can help with house moves, apartment relocations, office removals, packing, storage, and interstate transport across Victoria and the East Coast.