
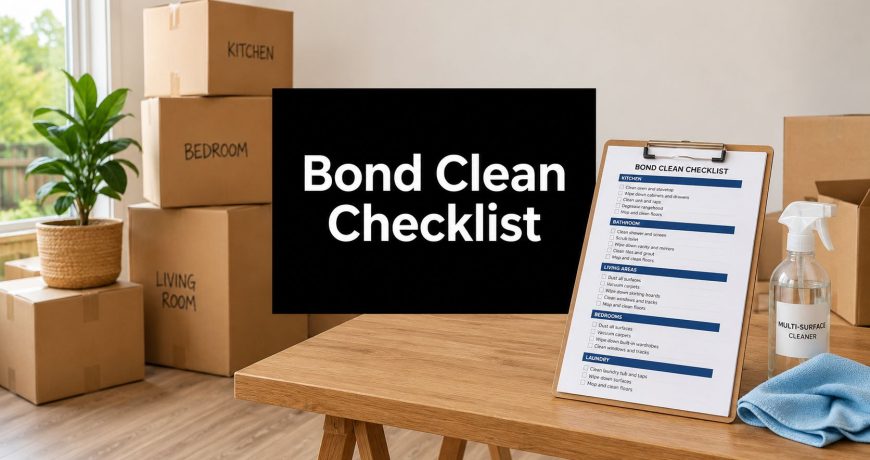
Your 2026 Bond Clean Checklist for a Full Refund
Moving day often ends the same way. The truck is loaded, the power is about to be cut, you are racing the clock, and the property still needs to meet inspection standard. That is when bond deductions happen. Usually not because the place is obviously dirty, but because grease is left on cupboard tops, soap scum is still sitting in grout lines, or the final check was done in poor light and a few agent-favourite problem spots were missed.
A bond clean works best as a plan, not a last-minute burst of effort. The goal is simple: finish the property to inspection standard, document the result properly, and avoid paying twice for the same job through re-cleans or bond deductions.
Industry guides from cleaning providers and tenancy resources consistently describe end-of-lease cleaning as a job that can take many hours, with professional pricing rising quickly based on property size, carpet requirements, and condition. That is why the DIY versus professional decision should be made early, not the night before handover. If the property is large, the oven is heavily soiled, the carpets need treatment, or you are already short on time, paying for targeted help can be cheaper than losing part of the bond.
Start two weeks out if possible. Strip the property back so cleaners can reach every surface. If cupboards, benches, and floors are still crowded with things you are sorting, cleaning takes longer and standards drop fast. A clear, practical guide to decluttering before you move helps cut wasted effort before the serious cleaning starts.
Then work to a sequence that matches how inspections happen. In the final week, handle the slow jobs first: kitchen buildup, bathrooms, walls, windows, and appliances. Leave floors, outdoor touch-ups, and final glass for moving day or the day after furniture is out. Finish with a daylight walkthrough.
Document everything as you go. Take wide photos of each room, then close shots of higher-risk areas such as the oven, range hood, shower screens, grout, inside cupboards, window tracks, and any existing wear. Time-stamped photos will not stop every dispute, but they give you a clean record if an agent claims work was missed or damage was caused after you left.
That is the strategy behind this checklist. It is a room-by-room cleaning plan, a timeline, and a way to decide where DIY makes sense and where paying a professional protects your bond better.
1. Kitchen Deep Clean and Degreasing
The kitchen is often the room that costs tenants part of the bond. It may look presentable under ceiling light, then fail the inspection the moment an agent opens the oven, runs a finger along a cabinet edge, or checks the range hood filter. Grease hides well. Agents know exactly where to look.
Clear the kitchen before you clean it. Food packets, spare containers, bench appliances, and half-packed drawers slow the job down and hide the mess that matters. If you are still sorting as you clean, standards slip fast. A practical guide on how to declutter before you move helps cut that wasted effort.
Clean in the order that saves rework
Start with dry dust and loose debris. Hit the tops of cupboards, exhaust covers, light fittings, and the outside of the range hood first. If you spray degreaser before removing dust, you create sludge and make every wipe harder.
Then move to the greasy work. Apply product and let it sit for a few minutes. That dwell time does more than hard scrubbing ever will, especially on splashbacks, cupboard fronts near the cooktop, and around handles where cooking residue and hand oils build up together.
Work through the kitchen in this sequence:
- Range hood filters: Remove and soak them in hot water with degreaser at the start.
- Cupboard fronts, handles, and edges: Focus on the doors closest to the stove.
- Splashback and wall area behind the cooktop: Wipe until there is no tacky residue left.
- Benchtops and sink: Clean corners, joins, and around tap bases.
- Oven: Remove racks and trays, then clean rails, door glass, seals, and the lip around the opening.
- Drawer runners and cupboard interiors: Vacuum crumbs first, then wipe.
- Stainless steel surfaces: Finish these last so you do not smear grease under polish.
One simple test works every time. Wipe suspect areas with a clean white microfibre cloth. If it comes away yellow, grey, or sticky, keep going.
The spots that get missed
Agents rarely care that the kitchen smelled like lemon spray for ten minutes. They care whether the surfaces are free of grease, crumbs, and residue. The common misses are the underside of wall cupboards, the top edge of the splashback, control knobs, tray grooves in the oven, and the narrow gap beside the fridge or microwave if it is safe to access.
In Queensland, rental cleaning obligations are tied to returning the property in the same condition as the start of the tenancy, allowing for fair wear and tear, as outlined by the Residential Tenancies Authority. That standard is what matters in practice. A kitchen does not pass because the benches were wiped. It passes when the detail areas are clean too.
A common real-world scenario is tenants leaving the oven until the end of the day, getting tired, and giving it one quick pass. That is usually where the callback starts. Handle the oven early enough to check it again once it dries, because baked-on residue often shows up after the first clean.
There is also a clear DIY versus pro trade-off here. Benches, cupboard fronts, and sink areas are usually worth doing yourself. A heavily soiled oven, thick range hood buildup, or grease above cupboards can eat hours and still come up short if you do not have the right product and tools. If you are choosing where to spend money, kitchen grease removal is one of the jobs that can justify professional help.
Before you leave the room, take photos with the oven door open, the range hood filter clean, the sink empty, and the cupboard interiors visible. Keep a few close shots of the trouble spots. If a dispute comes up later, that record helps. For moisture issues elsewhere in the property, Restore Heroes offers mold prevention advice, but in the kitchen the main protection is proof that the grease and residue were properly removed.
2. Bathroom Sanitisation and Mould Prevention

A bathroom can look clean at first glance and still fail on inspection. The usual problem is detail buildup. Soap scum on the screen, scale around taps, mould in silicone, hair in the drawer runners, dust on the exhaust cover, and a damp smell from poor drying.
Treat this room as a two-stage job. First remove residue. Then sanitise and dry it fully. If you reverse that order, you often waste product and leave visible marks behind.
Timing matters here more than tenants expect. Clean the bathroom early enough that surfaces can dry, because water spots, missed mould staining, and lingering odour are easier to judge once the room has aired out. If you are still packing while cleaning, avoid the common moving-day packing mistakes that slow down final cleaning, because boxes, bath mats, and loose toiletries usually end up blocking the areas agents inspect closely.
What agents usually notice first
Shower glass is high on the list because it shows hard water and soap residue fast. Use a proper descaler or mineral remover, give it dwell time, then scrub with a non-scratch pad and rinse well. If the glass still looks cloudy after drying, the issue may be etching rather than dirt. Cleaning can fix buildup. It cannot reverse damaged glass.
Grout and silicone need a separate check. Surface mould on grout can often be cleaned with the right product and agitation from a stiff grout brush. Silicone is less forgiving. If mould has penetrated the seal or the sealant is split, stained, or lifting, a landlord may treat that as maintenance or damage depending on the condition and tenancy history. Cleaning helps when the growth is superficial. It does not restore failed sealant.
Restore Heroes offers mold prevention advice that is useful after the clean, especially for keeping moisture under control. For bond return purposes, though, the priority is simple. Remove visible mould where cleaning can remove it, reduce odour, and leave the room dry enough that marks do not return before inspection. Consumer guidance from CHOICE on removing mould safely at home is a better reference point here than a recycled bond-cleaning roundup, because it explains safe treatment limits and when replacement may be the only realistic fix.
Bathroom checklist that actually covers inspection points
Work top to bottom so you do not re-soil finished surfaces.
- Remove everything that is not part of the property, including bins, bath mats, caddies, spare rolls, and toiletries.
- Dust and wipe exhaust fan covers, light fittings, vents, and the tops of mirrors or cabinets.
- Clean shower screens, tracks, tiles, taps, and the shower floor. Check corners where pink buildup and mould collect.
- Scrub grout lines and inspect silicone around the shower base, screen edges, and bath.
- Clean the vanity inside and out, including handles, hinges, shelf edges, and the underside of the basin.
- Disinfect the toilet fully, including the base, behind the pan, the seat hinges, and the flush buttons.
- Wipe skirting boards, door frames, switches, towel rails, and any shelving.
- Finish mirrors last and polish taps once the room is dry.
One missed area causes a lot of re-cleans. Shower tracks. They trap hair, scale, black residue, and dirty water, and agents check them because they are easy to spot.
DIY or call a pro
Bathrooms are usually worth doing yourself if the issues are ordinary. That means soap scum, light scale, toilet sanitising, and cabinet cleaning. It becomes a cost-benefit call when you have thick calcium buildup, heavy mould staining, etched glass, or damaged silicone. Those jobs can take hours, and even a careful DIY result may still look patchy.
If you hire help anywhere in a bond clean, bathrooms are one of the better places to spend the money when mould or hard water staining is advanced. Professional cleaners often have stronger descaling products, better brushes, and more experience judging what will clean up and what needs repair instead.
Documentation matters just as much as scrubbing. Take clear photos after the room is dry. Get wide shots of the whole bathroom, then close shots of the shower screen, grout, silicone, toilet base, vanity interior, exhaust fan cover, and mirror. If there is pre-existing staining that did not come out, photograph that too. A dated set of images can save an argument later.
3. Carpet Cleaning and Stain Removal

You finish moving the furniture, the room looks empty, and the carpet suddenly shows everything. Traffic lanes near the door, a coffee spot by the bed, dust lines along the skirting, and one old stain that somehow looked smaller when the sofa was still there. That is the point where many bond cleans go off track.
Carpet needs a plan, not a quick pass with the vacuum. Agents and property managers notice three things fast. Visible staining, lingering odour, and patchy results where one area looks freshly cleaned but the rest still looks dull. If you want the best chance of a full bond refund, inspect first, choose the right method second, and document the result before keys are handed over.
Start with a proper inspection
Walk the room in daylight and check from more than one angle. Dark traffic areas, especially in bedrooms and hallways, often look worse side-on than from above. Lift blinds, open curtains, and look at the carpet near wardrobes, under beds, at room edges, and around door swings.
Then sort what you are seeing into the right category:
- Loose soil and dust: Usually solved with slow, thorough vacuuming and edge work.
- Fresh surface stains: Often respond well to prompt blotting and spot treatment.
- Old set stains: Harder to shift and more likely to leave a shadow.
- Odour: Usually needs extraction, not just spot cleaning.
- Wear and shading: Cleaning may improve it, but it may not disappear because the fibre is physically worn.
That last point matters. Tenants often spend hours attacking wear marks that are not dirt. If the pile is crushed or the colour has faded from use, cleaning alone will not restore it. Photograph those areas clearly in case you need to show they fall under fair wear and tear.
DIY or hire a professional
DIY works best when the carpet is in reasonable condition and the problem is limited to light soil, a few isolated spots, or dust from moving furniture. It becomes a poor trade-off when you are dealing with pet odour, multiple stains, broad traffic lanes, or carpets that stay damp easily.
Rental machines can do a decent job, but they also create two common problems. Over-wetting, which can leave a musty smell or slow drying time, and detergent residue, which makes the carpet attract dirt again. Professional hot water extraction usually gives a better result on heavily used carpet because the equipment has stronger suction and better temperature control.
Cost matters here. If you are already paying for help with the rest of the bond clean, adding carpet cleaning can be cheaper than hiring a machine, buying stain products, spending half a day on the job, and still needing a second clean. The reverse is also true. For one small bedroom with a minor mark, DIY is often the sensible option.
If you are still boxing things up, avoid packing habits that make the floor dirtier right at the end. Common packing mistakes when moving home often lead to fresh carpet marks from dusty items, leaking bottles, or heavy boxes dragged across the floor.
How to handle stains without making them worse
Treat the stain you have, not the one you assume you have. Grease, wine, rust, makeup, pet urine, and ink all respond differently. Using one general spray on everything is how people bleach fibres, spread the stain, or lock it in.
Use this process:
- Vacuum first. Dry soil turns into mud once moisture hits it.
- Blot, do not scrub. Press with a clean cloth or paper towel to lift as much as possible.
- Test the product in a hidden spot. Check for colour loss or texture change.
- Apply lightly. More product does not mean a better result.
- Give it dwell time. Let the cleaner sit briefly so it can break down the stain.
- Blot again or extract. Work from the outside of the stain inward.
- Dry the area properly. Use airflow, open windows, or fans where possible.
One sentence of hard-earned advice. Rubbing is what turns a small spot into a larger, fuzzier patch that still shows after it dries.
Areas that get missed during bond cleans
The centre of the room usually gets attention. The edges do not. Yet carpet along skirting boards often holds dark dust lines, especially in rooms that have had beds, cabinets, or desks in the same spot for a long time.
Check these points before you call the room finished:
- Along skirting boards and in corners
- Inside wardrobes
- Behind doors
- Around bed legs and side tables
- At thresholds where carpet meets tile or timber
- Under window lines where condensation or dust may have collected
These spots can decide whether the room looks fully cleaned or rushed.
Build carpet cleaning into your timeline
Do the carpet after dusting, wall spot cleaning, and furniture removal, but before your final photo set and handover. Cleaning it too early means fresh foot traffic, packaging debris, or dust from the rest of the job can undo your work.
A practical timeline looks like this:
- 1 to 2 days before handover: Inspect, vacuum thoroughly, identify stains, buy products or book a cleaner.
- 1 day before handover: Complete stain treatment or professional extraction.
- After drying: Recheck in daylight for wicking, outlines, or odour.
- Final day: Take photos and keep shoes off the cleaned areas as much as possible.
Wicking catches a lot of people out. A stain looks gone while wet, then creeps back to the surface as the carpet dries. Always do one last inspection after full drying, not straight after cleaning.
Photograph the result like you expect a dispute
Take wide shots of each carpeted room from the doorway and opposite corners. Then take close photos of any former stain area, heavy traffic lane, wardrobe carpet, and transitions between rooms. If a mark improved but did not come out fully, photograph it clearly and keep a note of what treatment you used.
If you hired a professional, keep the receipt. Some leases and agents ask for proof of carpet cleaning, especially if pets were involved. Even where it is not strictly required, a dated invoice and a clean photo set put you in a much stronger position if the agent later claims the carpet was left dirty.
A good carpet result is not just about cleanliness. It is about leaving no easy reason for the bond to be reduced.
4. Floor Cleaning and Polishing
Floors carry the final impression of the whole property. Even after a strong clean, streaks, scuffs, sticky patches, and dusty edges can make the place feel unfinished. They also reveal whether the job was done in the right order. If the floor is dirty after everything else is clean, someone worked backwards.
Different materials need different treatment. Timber and laminate hate excess water. Tile can handle more moisture but often hides grime in the grout. Vinyl shows residue quickly if the product mix is too strong. Concrete can hold fine dust that keeps lifting even after a pass with the mop.
Match the method to the floor
Vacuum or sweep thoroughly before any wet work. That sounds basic, but it's where many people create muddy streaks. Dry debris has to come off first, especially around skirting boards, under radiators, behind doors, and in corners.
For tile, scrub grout separately if needed. For timber and laminate, use a lightly damp microfibre mop with careful wringing. For adhesive marks left by furniture pads or taped floor protectors, apply the correct remover, wait, then lift gently rather than scraping hard.
Clean floors late, polish last, and keep traffic off them. A great floor clean gets ruined fast by one final trip in shoes carrying dust from the balcony or garage.
Inspection points people miss
The visible centre of the room is rarely the issue. Agents look at edges, transitions, and spots where floor type changes. Kitchen floor corners, around toilet bases, laundry thresholds, and entry strips often collect residue that a quick mop misses.
In practice, the problem isn't usually “dirty floor” as a broad category. It's things like hairs stuck to bathroom tiles, detergent haze on dark boards, a sticky patch under the fridge, or dust lodged where skirting meets carpet. These are small enough to overlook and obvious enough to trigger complaints.
Use this order for better results:
- Dry clean first: Vacuum, sweep, edge detail.
- Spot-treat second: Scuffs, sticky residue, tracked-in marks.
- Wet clean third: Use the right product and minimal water where needed.
- Final polish last: Only after the rest of the room is done and dry.
One common scenario after a move is a polished floor that gets re-soiled by the removal process. If movers are still carrying items through, don't do the final floor finish yet. Time your last mop or polish after the furniture and boxes are gone, not before.
5. Wall Cleaning and Mark Removal
You finish moving the last box, step back, and the walls suddenly tell the true story of the tenancy. Scuffs behind the dining chairs, greasy fingerprints around light switches, tape residue near study desks, and dark rub marks along the hallway all become obvious once the rooms are empty. Wall cleaning matters because it sits right on the line between a routine clean and a damage claim. Handle it properly, and you reduce one of the most common sources of bond disputes.
Walls also punish aggressive cleaning. Scrub too hard and you can leave shiny spots, lift flat paint, or create a pale patch that looks worse than the original mark. Start with the least aggressive method and only step up if the mark remains.
Work in stages and document as you go
Treat wall cleaning as part of the handover plan, not a last-hour job. Check walls after furniture is out but before the final room clean, because that is when hidden marks show up. Take clear photos before you start, then again after each room is finished. If an agent later claims damage or missed cleaning, those photos give you a clean timeline of what was there and what you addressed.
A lot of these marks happen during the move itself. Bedheads rub against paint, boxes clip corners, and tape leaves residue where people create temporary hooks or labels. Good prep reduces that risk. A clear moving house checklist for Australia helps prevent avoidable wall damage before you are trying to clean it under time pressure.
Start at the top of the wall and work down. Remove cobwebs, dust cornices and ceiling lines, then wipe around switches, door frames, and other high-touch points. Apply product to the cloth, not straight to the wall. That gives you control and lowers the chance of streaking or soaking the paint.
Know what will clean off and what needs repair
Scuffs, light grime, and many adhesive marks will usually respond to a damp microfibre cloth and patient spot treatment. Magic erasers can help on stubborn marks, but they are abrasive. Use light pressure and test in an inconspicuous spot first.
Chips, dents, hook holes, torn plasterboard paper, and obvious paint mismatch are different. Those are repair issues, not cleaning issues. Tenants lose time trying to wash off defects that need patching, touch-up paint, or approval as fair wear and tear. Make that call early, because it affects whether you DIY, patch, or book a cleaner and handyman separately.
There is also a cost decision here. If the walls only have a handful of marks, DIY usually makes sense. If the property has multiple rooms with heavy scuffing, nicotine staining, greasy build-up, or high ceilings, professional help can be cheaper than risking paint damage and a return visit charge after inspection.
Focus your effort on the spots agents check closely:
- Around light switches and door handles: hand oils build up fast
- Behind beds, sofas, and desks: hidden rub marks appear after furniture is moved
- Hallway corners and narrow access points: removal traffic leaves scuffs here
- Hooks, stickers, and tape points: soften adhesive before wiping
- Skirting-line edges: dust and dirty splash marks collect at eye level when rooms are empty
One practical rule matters. If a mark needs repeated hard scrubbing to budge, stop and reassess. The bond risk from a faint scuff is often lower than the bond risk from stripped paint.
If glass, mirrors, or nearby glossy surfaces get smeared while you work, use the same finishing standard professionals use to achieve streak-free windows. If your move is tightly scheduled and you want fewer last-minute wall knocks, organising boxes and access with professional packing services can also cut down on fresh marks during the final clean.
6. Window and Glass Surface Cleaning

Glass exposes rushed cleaning more than almost any other surface. Smears, lint, dried droplets, and missed corners become obvious the moment daylight hits. That's why tenants often think the windows are done at night, then fail inspection the next morning.
The method matters more than the product brand. Clean frames and tracks first. Then do the glass. If you reverse that order, loose dirt from the frame ends up back on the pane.
The trick is the final check
Use a squeegee with smooth top-to-bottom strokes, then buff edges with a dry microfibre cloth. Mirrors and internal glass panels usually need the same sequence. Tracks need detailing too. Dirt in the corners of a sliding window or black residue in the runners can make an otherwise clean window look neglected.
If you're outsourcing packing or staging your move tightly, this is one of the tasks worth scheduling carefully around access and ladders. Good logistics reduce rework, much like using professional packing services reduces accidental mess and breakage elsewhere in a move.
For practical technique, this guide on how to achieve streak-free windows aligns with what works on move-out jobs. But inspection success usually comes down to one extra habit many tenants skip.
Property managers often re-inspect with fresh eyes in bright daylight at least 24 hours later, specifically to catch streaks and residue that artificial light can hide, according to this bond cleaning advice covering the daylight re-inspection habit.
What to check beyond the glass
Don't stop at the pane. Window frames, flyscreens where accessible, tracks, latches, and nearby sills all affect the impression. Mirrors need edge checks. Shower glass needs angle checks. Glass splashbacks need grease checks.
A common real-world problem is internal condensation residue or dried cleaner left in the lower corners. Another is a perfect centre pane with filthy tracks. If an agent opens the window and sees black grit, they're not calling that a clean pass.
Try this approach:
- Frames first: Dust and wipe before touching the glass.
- Mineral spots next: Let remover sit before scrubbing.
- Glass after that: Squeegee with controlled strokes.
- Daylight audit last: Re-check once everything has dried.
If rain is due soon, leave exterior panes until conditions are stable. Otherwise you risk doing a correct job at the wrong time.
7. Appliance Cleaning and Decontamination
A rushed move-out often fails here. The rooms may look clean, but the agent opens the oven, checks the dishwasher filter, pulls out the fridge crisper, and finds the residue that leads to a re-clean request.
Appliances are inspection magnets because they hold the mess tenants stop noticing. Grease bakes onto oven panels. Food sludge sits under dishwasher filters. Washing machine seals trap mould and detergent paste. Dryers collect lint well beyond the visible screen. A clean surface means very little if the working parts still smell, stick, or show buildup.
Treat appliance cleaning as a separate job in your bond clean plan, not something to squeeze in at the end. If you are coordinating packing, removals, disconnection times, and final cleaning yourself, a practical moving home to-do list for timing each task helps prevent common mistakes like cleaning the fridge after the power is off or forgetting to leave drying time.
Clean inside, underneath, and in the contact points
Start by unplugging or isolating power where safe and allowed. Then remove everything designed to come out. Trays, shelves, racks, filters, detergent drawers, and lint screens need separate washing and full drying before they go back in.
The oven needs more than a quick wipe. Clean the cavity, inner door glass, seals, rack runners, and the lip around the opening where grease hardens. Fridges need shelves, crisper drawers, door seals, handles, and the drain area checked for spills or mould. In washing machines, pull back the rubber seal and clean the folds. In dryers, clear the screen and inspect the vent path and edges where lint collects.
Photos matter here. Take clear before-and-after shots of the oven interior, dishwasher filter, fridge shelves removed and cleaned, and washing machine seal. If a dispute starts later, those images are far more useful than a general photo of the kitchen. The same applies to receipts for any carpet cleaning, pest treatment, or appliance service you hired out.
DIY or hire a pro?
This is one of the easiest areas to assess by time, risk, and replacement cost.
DIY makes sense if the appliance is lightly soiled, fully functional, and you have enough time for soaking, scrubbing, drying, and a second pass. Hiring a professional is often the better call when the oven has heavy carbon buildup, the rangehood filters are saturated, the fridge has been left closed and smells, or mould in a washer seal keeps returning. The trade-off is simple. DIY saves money upfront, but a failed inspection can cost more once re-cleans, lost time, and delayed bond release are added.
The details agents keep checking
Inspection failures usually come from the small parts that prove whether the appliance was cleaned properly:
- Dishwasher filter, spray arms, and door edges: trapped food causes odour fast
- Oven knobs, control panel, and door seals: grease sits in the gaps
- Fridge seals and drawer channels: crumbs, residue, and mildew hide in folds
- Microwave ceiling and vent area: splatter dries overhead and gets missed
- Washing machine detergent drawer and rubber seal: mould and sludge collect out of sight
- Dryer lint screen housing: lint often stays around the frame after the screen is emptied
Timing matters too. Defrost the fridge early enough that meltwater does not run onto cleaned floors. Dry it fully, then leave the door ajar if the property will sit vacant. Run one final empty rinse on the dishwasher or washing machine only if there is time for the interior to dry again before handover.
Australian tenancy guidance from Consumer Affairs Victoria makes the standard plain. A renter must leave the property reasonably clean, and that includes fixtures and items supplied with it, which is why neglected appliances so often end up in exit condition disputes: Consumer Affairs Victoria guidance on ending a rental agreement and cleaning expectations.
8. Outdoor Areas and Entry Point Cleaning
Outdoor areas often decide the first and last impression of the property. A clean interior can still feel poorly handed over if the balcony has cobwebs, the front door is grimy, bins are dirty, weeds are pushing through edges, or the garage floor is scattered with dust and leaves.
This is also where tenants run short on time. By the final day, focus naturally shifts indoors, but entry points and external spaces are part of the inspection picture. If they look ignored, that undermines the whole handover.
Prioritise what gets seen and used
Start with dry debris. Sweep leaves, remove rubbish, clear cobwebs, and empty anything left behind. Then clean hard surfaces, doors, railings, light fittings, and visible hardware. If you use a pressure washer, keep the setting controlled so you don't damage paint, timber, grout, or soft joints.
Western Australia adds one non-cleaning detail that's easy to miss during the move. Tenants must provide a written forwarding address to the lessor so the Return of Rental Bond form can be processed correctly, and failing to do that can expose them to a $5,000 bond forfeiture fine, according to this WA end-of-lease bond clean checklist. Cleaning matters, but handover admin matters too.
Don't leave rubbish or forgotten items
Rubbish left behind is one of the most common reasons for bond deductions. That includes old pot plants, broken furniture on balconies, loose storage in sheds, food in outdoor cupboards, and random items sitting in the garage because “the rest of the place is done”.
- Front entry: Wipe the door, handles, frame, and surrounding glass.
- Balcony or patio: Sweep, wash, and clear corners and drains.
- Garage and storage: Remove all belongings and dust the floor edges.
- Bins and outdoor fixtures: Clean enough that they don't smell or look abandoned.
A spotless lounge room won't save a handover if the garage still has junk, the balcony has cobwebs, or the front door handle is sticky.
One practical example is the tenant who does a strong internal clean but leaves a few bags beside the bins for “later pickup”. At inspection, that still counts as left-behind rubbish. Finish external clearing completely before keys go back.
Bond Clean Checklist: 8-Point Comparison
| Service | Implementation complexity 🔄 | Resource requirements ⚡ | Expected outcomes 📊⭐ | Ideal use cases 💡 | Key advantages ⭐ |
|---|---|---|---|---|---|
| Kitchen Deep Clean and Degreasing | High 🔄🔄🔄, labour‑intensive, specialised techniques | High ⚡⚡⚡, heavy‑duty degreasers, PPE, optional steam | Very high 📊⭐, removes hardened grease, improves hygiene and bond recovery | Move‑out kitchens with heavy grease or built‑up residue | Prevents bond deductions; restores hygienic, move‑ready kitchen |
| Bathroom Sanitisation and Mould Prevention | Medium‑High 🔄🔄, careful mould treatment and ventilation needed | Medium ⚡⚡, disinfectants, mould removers, PPE, optional dehumidifier | High 📊⭐, eliminates mould/health hazards and reduces moisture risk | Bathrooms with mould, humidity issues or for bond inspections | Removes allergen risks; prevents moisture‑related claims |
| Carpet Cleaning and Stain Removal | Medium 🔄🔄, stain identification + extraction steps | High ⚡⚡⚡, hot water extraction equipment, specialised solutions | High 📊⭐, restores appearance, removes odours; some stains may persist | Heavily soiled carpets, pet stains, high‑traffic areas pre‑move | Dramatic appearance improvement; often avoids replacement costs |
| Floor Cleaning and Polishing | Medium 🔄🔄, surface‑specific methods, finish restoration | Medium ⚡⚡, buffers, pH‑neutral cleaners, polish/wax | High 📊⭐, streak‑free, protected floors with strong visual impact | High‑visibility floors (hardwood, tile, vinyl) for inspections | Immediate visual uplift; surface protection and longevity |
| Wall Cleaning and Mark Removal | Low‑Medium 🔄, careful technique to avoid paint damage | Low ⚡, magic erasers, mild cleaners, touch‑up paint | Medium‑High 📊⭐, reduces visible marks and potential deductions | Scuffed or marked walls before final inspection | Low‑cost, high‑impact cleaning; prevents minor bond charges |
| Window and Glass Surface Cleaning | Low‑Medium 🔄, technique and safety for exterior access | Low‑Medium ⚡⚡, squeegees, cleaners, extension tools, safety gear | High 📊⭐, streak‑free glass, increased natural light and appeal | Final walkthroughs, rooms relying on natural light | Quick visible improvement; enhances perceived space and cleanliness |
| Appliance Cleaning and Decontamination | Medium 🔄🔄, access to internal components, careful handling | Medium ⚡⚡, degreasers, baking soda, brushes, PPE | High 📊⭐, removes residue and odours, improves function and hygiene | Fridges, ovens, dishwashers and laundry appliances pre‑move | Prevents odour/health issues; improves appliance efficiency |
| Outdoor Areas and Entry Point Cleaning | Medium‑High 🔄🔄🔄, weather and safety considerations | Medium ⚡⚡, pressure washer, outdoor cleaners, ladders | High 📊⭐, strong first impression; reduces outdoor deductions | Patios, decks, entryways and gardens before inspection | Enhances curb appeal; demonstrates overall property care |
Beyond the Clean: Final Steps for a Flawless Handover
It is 5:30 pm, the truck has left, the unit looks clean, and then the agent opens the oven, slides a finger along the window track, and checks the inside of the bathroom vanity. That is how bonds get chipped away. Final handover is less about how hard you worked and more about what can still be seen, photographed, and written into an exit report.
Treat the last stage as a handover plan, not a last-minute wipe-down. The usual deduction points are the small ones tenants rush past. Grease on the range hood filter, soap film on shower glass, lint in the dryer cavity, dust on exhaust covers, grime around tap bases, dirt in sliding door tracks, and rubbish left in outdoor bins all stand out during inspection because they suggest the clean was incomplete.
Follow a check sequence that matches the way property managers inspect. Start at the entry and do a standing-height scan of each room for obvious marks, smears, dust, and missed items. Then open everything. Cupboards, drawers, wardrobes, appliance doors, laundry cabinets, and windows. Finish low, with a torch if needed, checking skirtings, corners, under sinks, behind toilets, around fixed appliances, and along edges where dust collects.
If a room only looks clean from the doorway, it is not ready.
Photos matter because they shift a dispute from opinion to evidence. Take wide photos of every empty room in good light. Then take close shots of the areas that regularly cause arguments: the oven interior, cooktop, range hood filter, shower screen, toilet base, vanity storage, sink cabinets, window tracks, laundry tub, balcony, garage floor, and any outdoor area listed on the lease. On the phone I use, I keep location and time data switched on for move-out day, then back everything up immediately so nothing gets lost.
Keep every receipt in one place. Professional carpet cleaning, pest treatment, rubbish removal, repairs, and any specialist work should be saved as PDFs and emailed to yourself before key return. If the lease required a service, the invoice is what proves it was done. Verbal assurances do not help much once a claim is disputed.
Timing matters too. In New South Wales, tenants can apply for bond refund online through NSW Fair Trading, and the process sets a clear dispute window once a claim is lodged. Check the current steps on the official NSW Fair Trading rental bonds page. The practical point is simple. Know your state process, lodge promptly, and do not wait for the agent to do it first if your tenancy has ended and the property is ready.
This is also where the DIY versus pro decision becomes practical, not theoretical. If the place is in solid condition and you have the time, equipment, and patience for detail work, a DIY clean can save money. If there is heavy grease, mould staining, pet odour, flea treatment requirements, large carpet stains, or a tight handover deadline, paying for specialist help often costs less than a deduction plus the stress of a re-clean. The right choice depends on condition, lease terms, and how much risk you can afford.
Plan the last 48 hours properly. Move almost everything out before the final clean. Keep one kit behind: vacuum, mop, microfibre cloths, paper towels, bin liners, glass cleaner, all-purpose cleaner, and a charged phone for photos. Do the final pass in daylight if possible, because artificial light hides streaks, dust, and water marks that show up fast during an afternoon inspection.
Before returning the keys, make sure the property is empty, dry, odour-free, and documented. Check letterboxes, storage cages, balconies, garden areas, and bins. Return all keys, remotes, fobs, and access cards together. A clean property with poor paperwork or rushed handover still creates avoidable problems. A clean property with photos, receipts, and good timing gives you a much stronger position if any part of the bond is challenged.
If you want the move itself to run as smoothly as the clean, Get n Go Removals Melbourne is a strong choice for local and interstate relocations, packing, unpacking, furniture handling, and storage. A well-timed moving team makes bond cleaning easier because you're not working around delays, half-packed rooms, or last-minute transport problems.